

Building ETL Pipeline in Google Cloud Platform: A Project-Based Guide with PySpark and Airflow


Table of contents
ETL (Extract, Transform, Load) is a process of integrating data from various sources, transforming it into a format that can be analysed, and loading it into a data warehouse for business intelligence purposes. Building an ETL pipeline can be a daunting task, but with the help of PySpark, Airflow, and Google Cloud Platform (GCP), it becomes a straightforward and scalable process. In this project, we will build a complete end-to-end ETL pipeline using PySpark, Airflow, and GCP tools such as Cloud Storage, DataProc, Cloud Composer, and Bigquery.
Scenario
Let me set the scene for this project so that you can understand its main objective. Imagine that you are working as a Data Engineer for a taxi company based in New York. The taxi company wishes to make data-driven decisions using the data they are collecting from all its taxi trips. Each taxi has a meter that communicates information about the length, distance, and pickup and drop-off location for each trip. A second device receives customer payments and transmits information regarding taxi fares. Being a data engineer of this company, the company would like you to build an ETL pipeline, that extracts all the data collected from each taxi trip, apply some business rules and load it into some data warehouse in order to analyse and draw insights from it.
The dataset that we are using for this project is provided to us by Brian Donovan and Daniel B. and can be downloaded from here. For a detailed description of the dataset click here.
Prerequisite
Before we start building this project, you need to have some basic understanding of the following:
1. PySpark and Airflow.
2. GCP tools such as Cloud Storage, Dataproc, Cloud Composer, and Big Query.
Note that this is not at all a beginner-friendly project. Although I have tried to give as many details as possible for each step, a basic knowledge of the above tech is required.
Project Overview
The following flow diagram gives us an overview of this project. We are assuming that all the data collected from each taxi trip is stored in google cloud storage as a CSV file.

For performing extract, transform, and load operations in the ETL pipeline, we will be using PySpark. PySpark is an open-source big data processing framework that provides an API for programming in Python. PySpark can easily handle large datasets and can be integrated with various data sources. To submit the PySpark jobs, we will use Dataproc from GCP tools. After cleaning and validating the data, we will load the final data in Big Query. To automate and orchestrate this entire process, we will use airflow.
Let us now start building the project. Look for the parts highlighted in yellow to know where to click while following the instructions given.
Create a New GCP Project
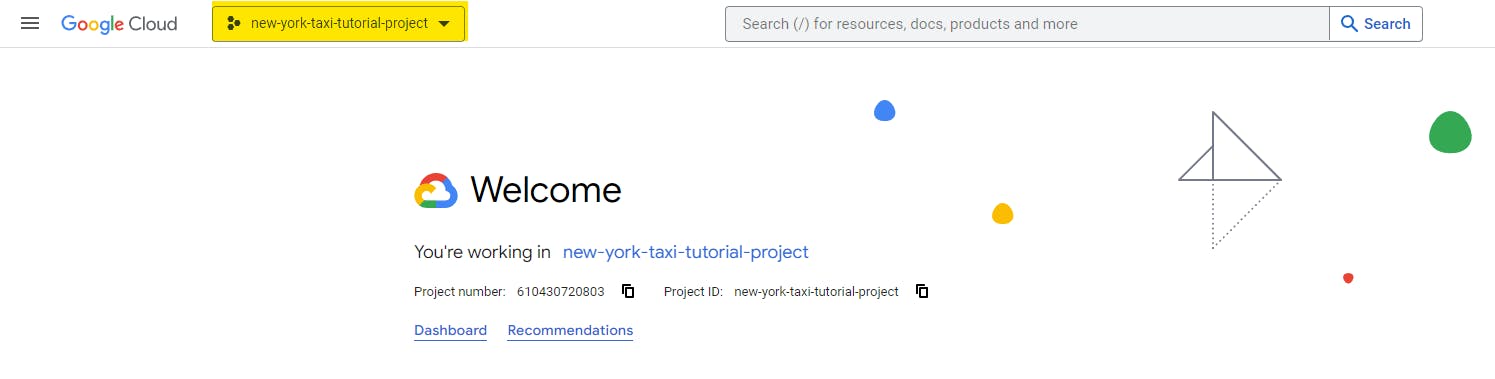
Lets us create a new project in the GCP console.
Click on the drop-down in the top left corner.
Click on 'NEW PROJECT'
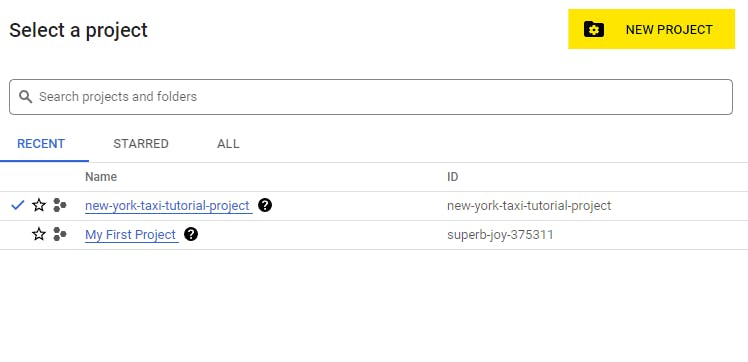
Give it some project name and then click on 'CREATE'

Activate Cloud Shell
One can always use the GUI to interact with GCP resources and complete all the tasks. However, for this project, we will stick to Google Cloud Shell to perform most of the tasks. Google Cloud Shell is a virtual machine that contains a set of development tools. It has a persistent 5GB home directory and is hosted on Google Cloud. Cloud Shell allows you to access your Google Cloud resources through the command line.
Click on Activate Cloud Shell in the top-right corner of the Google Cloud console.

List all the project IDs and copy the ID of your newly created project.
gcloud config list projectSet a variable GCP_PROJECT_ID equal to your project ID. Replace <your-project-id> with the project ID you copied in the previous step.
export GCP_PROJECT_ID=<your-project-id>Now set your newly created project at the core of Cloud Shell
gcloud config set project $GCP_PROJECT_ID
Create and Load Data in Cloud Storage Bucket
The first task in this project is to create a cloud storage bucket and load the CSV files of trip data and trip fare data into that bucket.
Create a cloud storage bucket
gsutil mb gs://$GCP_PROJECT_IDOnce the bucket is created, go to the bucket, and upload the data folder which can be downloaded from here. Use these data files only instead of the original data files because the original files did not have an ‘id’ column for us to join the two datasets at a later stage. Furthermore, these files are just a subset of the original files. It will be easier for us to implement the project using a subset of the original files as their computational demand will be much less.
Create a Big Query Dataset.
Our ETL pipeline will load all the transformed data into a Big Query dataset. To create the BigQuery dataset run the following command in Cloud Shell.
bq mk new_york_taxi_bq_dataset
Build the ETL pipeline using PySpark.
As already mentioned, to build our ETL pipeline, we will use PySpark and the PySpark script for the same is shown below. This script will read the trip data and trip fare data from the cloud storage, perform some data cleaning and data validation operations, join the two datasets on the ‘id’ column, and load the final dataset in Big Query. For a detailed explanation of each step in the ETL PySpark script, refer to this jupyter notebook.
from pyspark.sql import SparkSession
from pyspark.sql.functions import to_timestamp
import os

def create_spark_session():
    spark = SparkSession.builder \
        .master("yarn") \
        .appName('new-york-taxi-pipeline') \
        .getOrCreate()
    return spark


if __name__ == '__main__':
    spark = create_spark_session()

    #Get the environment variables
    TRIP_DATA_PATH = os.environ.get('TRIP_DATA_PATH', 'gs://new-york-taxi-    data-bucket/trip_data/trip_data_test.csv')
    FARE_DATA_PATH = os.environ.get('FARE_DATA_PATH', 'gs://new-york-taxi-data-bucket/fare_data/fare_data_test.csv')
    BUCKET_NAME = os.environ.get('BUCKET_NAME', 'new-york-taxi-tutorial-project-temporary-bucket')
    BQ_DATASET = os.environ.get('BQ_DATASET', 'new_york_taxi_bq_dataset')
    BQ_TABLE = os.environ.get('BQ_TABLE', 'new_york_taxi_bq_table')

    #Extraction phase
    ##read data from cloud storage
    trip_data = spark.read.option("header", True).option("inferSchema", True).csv(TRIP_DATA_PATH)
    fare_data = spark.read.option("header", True).option("inferSchema", True).csv(FARE_DATA_PATH)


    #Transformation Phase
    ##remove leading white space from column names
    ###trip data
    old_column_names = [
        ' hack_license',
        ' vendor_id',
        ' rate_code',
        ' store_and_fwd_flag',
        ' pickup_datetime',
        ' dropoff_datetime',
        ' passenger_count',
        ' trip_time_in_secs',
        ' trip_distance',
        ' pickup_longitude',
        ' pickup_latitude',
        ' dropoff_longitude',
        ' dropoff_latitude'
        ]

    new_column_names = [
        'hack_license',
        'vendor_id',
        'rate_code',
        'store_and_fwd_flag',
        'pickup_datetime',
        'dropoff_datetime',
        'passenger_count',
        'trip_time_in_secs',
        'trip_distance',
        'pickup_longitude',
        'pickup_latitude',
        'dropoff_longitude',
        'dropoff_latitude'
        ]

    for i in range(len(old_column_names)):
        trip_data = trip_data.withColumnRenamed(old_column_names[i], new_column_names[i])

    ###fare data
    old_column_names = [
        ' hack_license',
        ' vendor_id',
        ' pickup_datetime',
        ' payment_type',
        ' fare_amount',
        ' surcharge',
        ' mta_tax',
        ' tip_amount',
        ' tolls_amount',
        ' total_amount'
        ]

    new_column_names = [
        'hack_license',
        'vendor_id',
        'pickup_datetime',
        'payment_type',
        'fare_amount',
        'surcharge',
        'mta_tax',
        'tip_amount',
        'tolls_amount',
        'total_amount'
        ]

    for i in range(len(old_column_names)):
        fare_data = fare_data.withColumnRenamed(old_column_names[i], new_column_names[i])

    ###convert string to timestamp
    trip_data = trip_data.withColumn('pickup_datetime', to_timestamp('pickup_datetime')) \
            .withColumn('dropoff_datetime', to_timestamp('dropoff_datetime'))


    ##Join Trip Data and Fare Data
    trip_data.createOrReplaceTempView("trip_data")
    fare_data.createOrReplaceTempView("fare_data")

    final_df = spark.sql('''
    select
        a.id,
        a.medallion,
        a.hack_license,
        a.vendor_id,
        a.rate_code,
        a.pickup_datetime,
        a.dropoff_datetime,
        a.passenger_count,
        a.trip_time_in_secs,
        a.trip_distance,
        a.pickup_longitude,
        a.pickup_latitude,
        a.dropoff_longitude,
        a.dropoff_latitude,
        b.payment_type,
        b.fare_amount,
        b.surcharge,
        b.mta_tax,
        b.tip_amount,
        b.tolls_amount,
        b.total_amount
    from trip_data as a
        left join fare_data as b
            on a.id = b.id
    '''
                         )

    ##data validation and data accuracy
    ###drop null values in 'passenger_count', 'trip_time_in_secs', 'trip_distance', 'fare_amount'
    final_df = final_df.na.drop(subset=[
    'passenger_count',
    'trip_time_in_secs',
    'trip_distance',
    'fare_amount'
    ])

    ###'passenger_count', 'trip_time_in_secs', 'trip_distance', 'fare_amount' must be greater than 0
    final_df = final_df.filter((final_df.passenger_count > 0) & \
                           (final_df.trip_time_in_secs > 0) & \
                           (final_df.trip_distance > 0) & \
                           (final_df.fare_amount > 0)
                          )


    #Loading Phase
    ##Saving the final to BigQuery
    ###Use the Cloud Storage bucket for temporary BigQuery export data used by the connector.
    spark.conf.set('temporaryGcsBucket', BUCKET_NAME)

    final_df.write.format('bigquery') \
    .option('table', f'{BQ_DATASET}.{BQ_TABLE}') \
    .mode('append') \
    .save()
Ideally, we would be setting environment variables for all the variables under the Get the environment variables section in the above script. But, we will not make things more complicated and set the variables in the above script itself. Download the PySpark script from here and set all the values of each variable under the #Get the environment variables section appropriately as per your project. Once done upload it into the Cloud Storage bucket which we created earlier. To run this PySpark script we will use Dataproc. To use Dataproc, we need to enable it before using it. Therefore, go to Dataproc and click on Enable.
One can always create a Dataproc cluster manually. However, in this project, we will leverage the power of airflow to create the Dataproc cluster, submit the PySpark job, and then again delete the Dataproc after finishing the job.
Orchestrate the ETL pipeline using Airflow.
Let us now summarise all steps that we need to perform in order for the pipeline to run smoothly. First, we must check whether CSV files for both trip data and trip fare data exist or not in the cloud storage. After confirming that both files are present in the cloud storage, we need to create a Dataproc cluster with appropriate configurations. Once the Dataproc cluster is created successfully, we will have to submit the PySpark job to the Dataproc cluster with proper jar files. Now once the Pyspark job is completed we also must delete the Dataproc cluster so that we don’t incur any extra charges.
Instead of manually performing all these steps, we will use airflow. Airflow DAG will simplify and automate all these steps for us. The following figure shows us the Airflow DAG.

Airflow DAG Code
from airflow import DAG
import os

#gcp operators
from airflow.providers.google.cloud.sensors import gcs

#dataproc
from airflow.providers.google.cloud.operators.dataproc import (
    DataprocCreateClusterOperator,
    DataprocDeleteClusterOperator,
    DataprocSubmitJobOperator,
    ClusterGenerator
)

#other operators
from datetime import datetime, timedelta

default_args = {
    "owner": "airflow",
    "email_on_failure": False,
    "email_on_retry": False,
    "email": "admin@localhost.com",
    "retries": 0,
    "retry_delay": timedelta(minutes=5)
}

##Get the environment variables
CLUSTER_NAME = os.environ.get('CLUSTER_NAME', 'new-york-taxi-dataproc-cluster')
GCP_PROJECT_ID = os.environ.get('GCP_PROJECT_ID', "new-york-taxi-tutorial-project")
REGION = os.environ.get('REGION', 'europe-west1')
ZONE = os.environ.get('ZONE', "europe-west1-d")

####check operator
BUCKET_NAME = os.environ.get('BUCKET_NAME', "new-york-taxi-data-bucket")
TRIP_DATA_FILE_NAME_PREFIX = os.environ.get('TRIP_DATA_FILE_NAME_PREFIX', "trip_data/trip_data")
FARE_DATA_FILE_NAME_PREFIX = os.environ.get('FARE_DATA_FILE_NAME_PREFIX', "fare_data/fare_data")

#Others
TEMP_BUCKET = os.environ.get('TEMP_BUCKET', "new-york-taxi-tutorial-project-temporary-bucket")

#DataProc Cluster Configurations
CLUSTER_GENERATOR_CONFIG = ClusterGenerator(
    project_id=GCP_PROJECT_ID,
    zone=ZONE,
    master_machine_type="n2-standard-2",
    worker_machine_type="n2-standard-2",
    num_workers=2,
    worker_disk_size=300,
    master_disk_size=300,
    storage_bucket=TEMP_BUCKET,
).make()

#PySpark Job Configurations
PYSPARK_JOB = {
    "reference": {"project_id": GCP_PROJECT_ID},
    "placement": {"cluster_name": CLUSTER_NAME},
    "pyspark_job": {
    "main_python_file_uri": "gs://new-york-taxi-etl-pipeline-code/etl_pyspark.py",
    "jar_file_uris": [
    "gs://spark-lib/bigquery/spark-3.1-bigquery-0.28.0-preview.jar"
    ]
    },
}


#Airflow DAG
with DAG(dag_id="new-york-taxi-pipeline", schedule_interval="@monthly", default_args=default_args, tags=['new-york-taxi'], catchup=False) as dag:

    check_trip_data_file = gcs.GCSObjectsWithPrefixExistenceSensor(
        task_id = "check_trip_data_file",
        bucket = BUCKET_NAME,
        prefix = TRIP_DATA_FILE_NAME_PREFIX,
        google_cloud_conn_id = 'google_cloud_storage_default'
    )

    check_fare_data_file = gcs.GCSObjectsWithPrefixExistenceSensor(
        task_id = "check_fare_data_file",
        bucket = BUCKET_NAME,
        prefix = FARE_DATA_FILE_NAME_PREFIX,
        google_cloud_conn_id = 'google_cloud_storage_default'
    )

    create_dataproc_cluster = DataprocCreateClusterOperator(
        task_id="create_dataproc_cluster",
        cluster_name=CLUSTER_NAME,
        project_id=GCP_PROJECT_ID,
        region=REGION,
        cluster_config=CLUSTER_GENERATOR_CONFIG,
    )
    submit_pyspark_job = DataprocSubmitJobOperator(
    task_id="submit_pyspark_job", job=PYSPARK_JOB, region=REGION, project_id=GCP_PROJECT_ID)

    delete_dataproc_cluster = DataprocDeleteClusterOperator(
    task_id="delete_dataproc_cluster",
    project_id=GCP_PROJECT_ID,
    cluster_name=CLUSTER_NAME,
    region=REGION,
    )

[check_trip_data_file, check_fare_data_file] >> create_dataproc_cluster >> submit_pyspark_job >> delete_dataproc_cluster
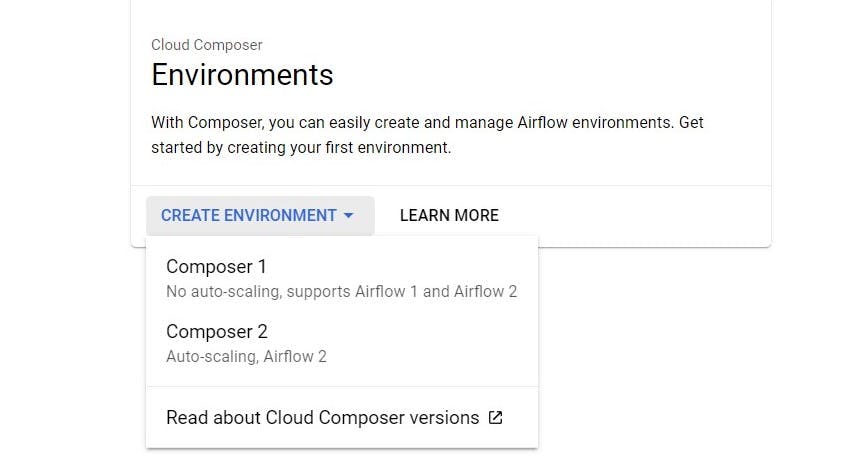
Go to Composer and Click on 'CREATE ENVIRONMENT'. Click on Composer 1. Configuration of Composer 1 will be more than sufficient for us to complete this project.
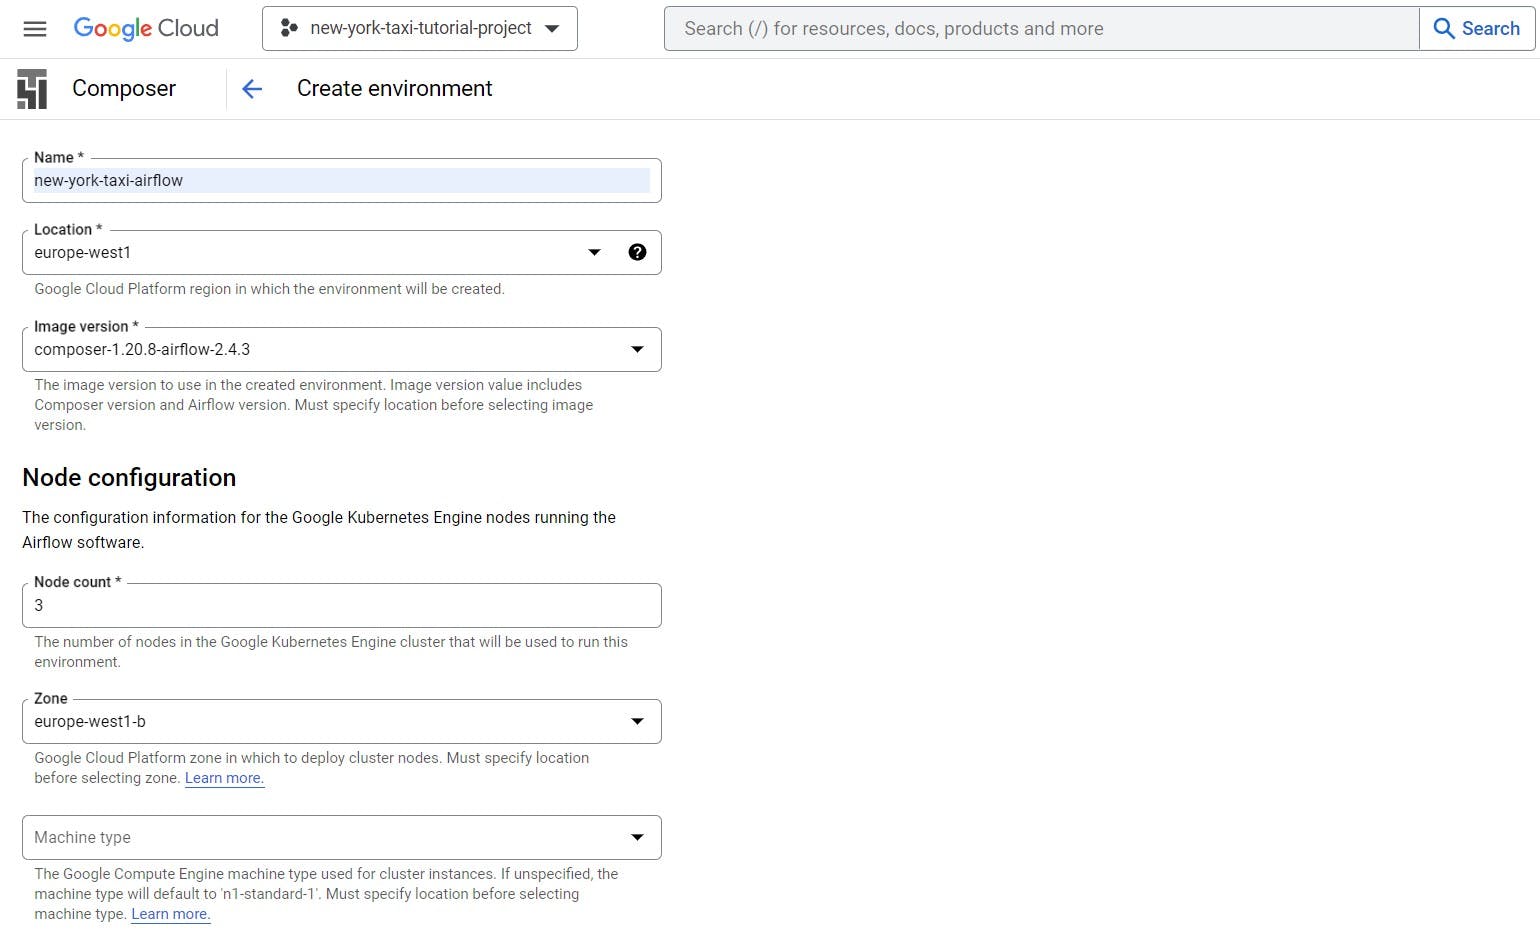
Give the composer a name and select any location of your choice and then click on 'CREATE' at the bottom of the page.
Once the Cloud Composer is up and running, Click on 'OPEN DAGS FOLDER'.

Download the Airflow DAG script from here. Make sure that you are setting all the variables under the Get the environment variables section appropriately as per your project.
Once done, upload the Airflow DAG script in the DAGS folder. After 2-3 minutes you can see the new DAG in the airflow UI. Once the DAG is visible, manually trigger the DAG.
Check Final Data in BigQuery
After running the whole Airflow DAG without any errors, you can preview the final data in BigQuery. You can also run ad-hoc SQL queries on the final dataset to gain insights and make future predictions.
Conclusion and Future Work
There you go! That's how you can build an end-to-end scalable ETL pipeline in GCP using PySpark and Airflow. Now, for future work, one can create an interactive dashboard using Tableau or Power BI using the BigQuery Dataset. Furthermore, using Machine Learning and Deep Learning, one can make all kinds of predictions like trip total cost, total no. of taxi trips on a particular day, etc and that's what our goal is going to be for the next blog of 'Mastering Tech By Building Projects'.
If you like this blog and got to learn something new from it! Do comment down below and let me know. Also, if you are facing any errors, let me know in the comment section and I will try to resolve them. Do come to hang out with me on LinkedIn as well (LinkedIn Profile).